Keypoint Video Labeling
Keypoint labeling is a powerful method to systematically study motion, behavior, and anatomical positioning over time. By marking and tracking specific locations on subjects across frames in a video, you can extract detailed data about the dynamics of movement.
For example, keypoint data can be used to:
Quantify fine-scale behaviors like licking, grooming, or chewing
Track anatomical features over time for posture and gait analysis
Align behavioral sequences with physiological recordings
Train machine learning models for automated behavior detection
Visualize and compare motion trajectories across individuals or trials
This tutorial will guide you through the process of labeling keypoints on a video and saving the keypoint data.
Step 1: Load Video or Existing Labels
To begin labeling:
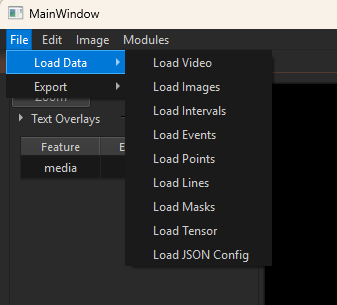
- Open the application and navigate to
File > Load Data. - Select the video you intend to annotate.
Alternatively, if you’ve already created keypoints and want to review or update them:
- Select
File > Load JSON Configurationand choose your.jsonfile.
See: Setting up a JSON File for more on configuration options.
Step 2: Open the Data Manager
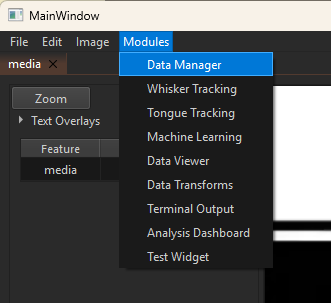
To create or manage point data:
- Navigate to
Modules > Data Managerto open the Data Manager Module.
Step 3: Create a New Keypoint Feature
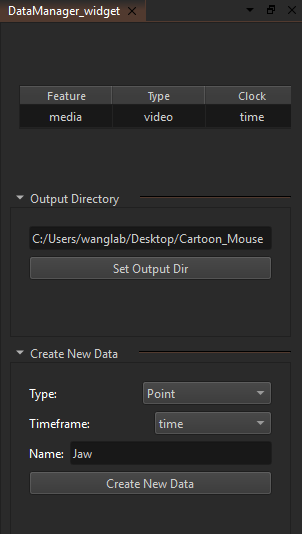
In the Data Manager:
- Set the Output Directory: This is where your labeled data (CSV) will be saved.
- Example:
C:/Users/wanglab/Desktop/Cartoon_Mouse
- Example:
- Create New Data:
- Type:
point - Time Frame: Select based on your analysis requirements (e.g.,
timefor temporal tracking). - Name: Choose a descriptive name (e.g.,
jaw,nose, orpaw).
- Type:
Click Create New Data to add the new feature.
Step 4: Edit and Add Keypoints in the Media Widget
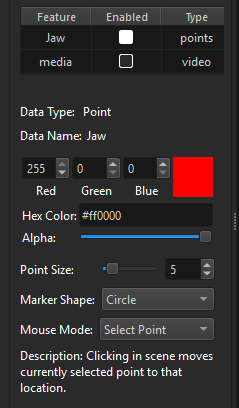
Once the point feature is created:
- Enable the Feature: Select the feature in the media widget to activate the keypoint editor.
- Customize Appearance:
- Choose a color using the hex selector.
- Adjust the opacity (Alpha) for better contrast against the video.
- Modify the size and shape of the marker if needed.
- Begin Labeling:
- Switch mouse mode to “Select Point”.
- Click anywhere in the video frame to add a point.
- Clicking on an existing point will move it.

Note: The keypoint is recorded as a single-pixel coordinate. Visual shape and style are only for display and are not saved.
Step 5: Review and Export Your Labels
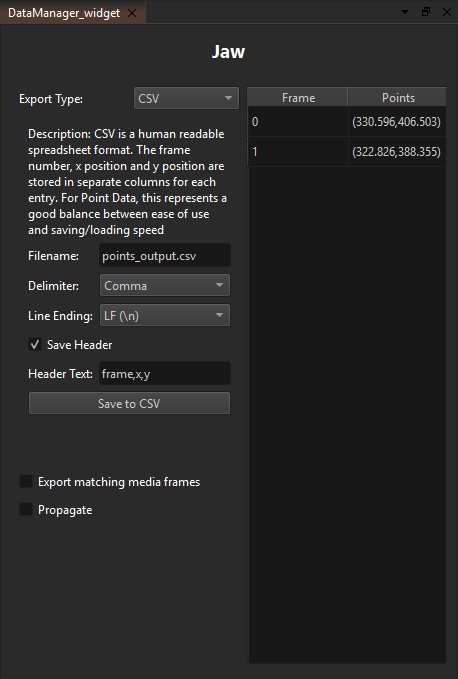
After labeling:
- Select your feature (e.g.,
jaw) in the Data Manager. - You’ll see a spreadsheet with:
- Frame indices
- (x, y) coordinates for each labeled keypoint
Export Options:
- File Name: Choose a meaningful name for your CSV.
- Delimiter: (e.g., comma
,or tab\t) – separates columns. - Line Ending: Select line break style (
\n,\r\n, etc.). - Header: Optionally include a header row with custom labels.
Optional: Export Matching Media Frames
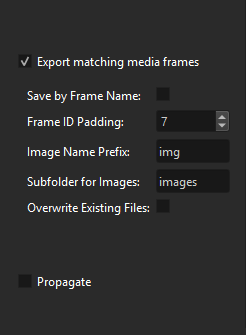
You can export the video frames where keypoints were labeled:
- Check
Export Matching Media Frames. - Choose from export options:
- Save by Frame Name
- Frame ID Padding
- Image Name Prefix
- Subfolder for Images
- Overwrite Existing Files
Keypoints will not be drawn on these frames. Only raw frames are exported.
Step 6: Save to CSV
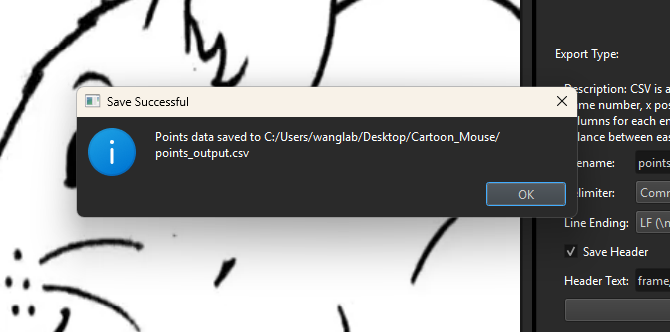
Once you’ve reviewed your labels:
- Click “Save to CSV”
A confirmation will appear showing the file path.
Your labeled keypoint data is now saved and ready for further analysis.
Summary
This tutorial demonstrated how to:
- Load a video or keypoint configuration
- Create and configure keypoint data
- Annotate frames with feature coordinates
- Export label data and relevant frames